Kuwii
Dip Powder Manicure Kit
Dip Powder Manicure Kit
Couldn't load pickup availability
The Dip Powder Manicure Kit contains everything you need to create salon-quality, long-lasting nail enhancements right at home. Featuring five vibrant colors and a complete set of professional liquids, this kit delivers durability and a beautiful, high-gloss finish.
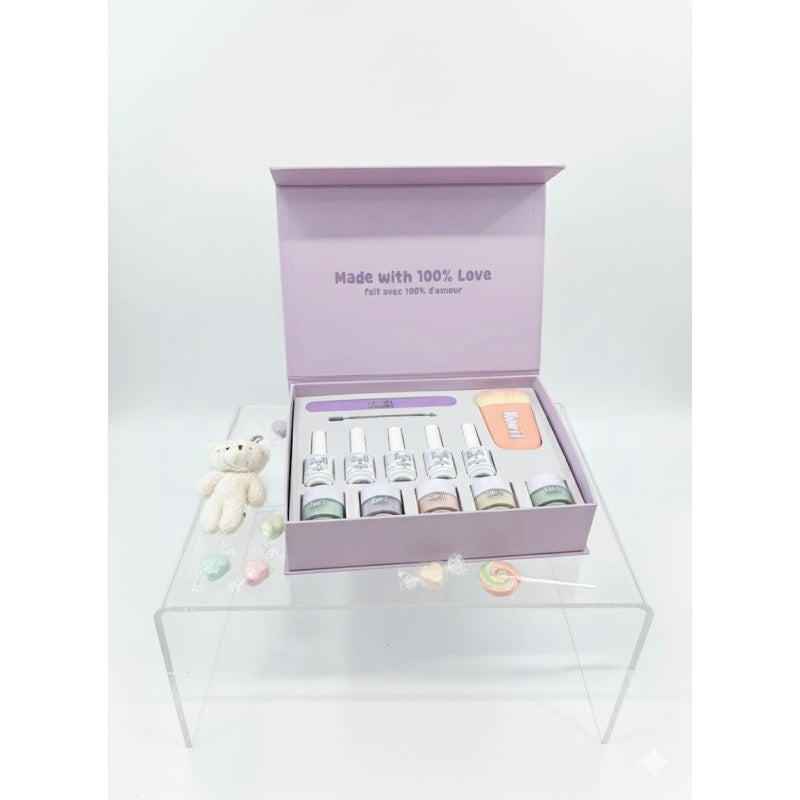
Kit Contents:
- 5 Dip Powder Colors: Pink, Blue, Purple, Yellow, and Pink
- Dip System Liquids: Primer, Bottom Coat (Base Resin), Activator, Top Coat, and Brush Saver
- Tools: Nail File, Cuticle Pusher
- Extras: Adorable Teddy Bear Plushie, and Candy Treats (Candies at Random)
How to Use (Step-by-Step Instructions):
For best results, follow the Dip System sequence precisely:
Step 1: Prep Use the Cuticle Pusher to gently push back the cuticles. Shape the natural nail with the Nail File and lightly buff the surface to remove shine. Cleanse the nail, then apply a thin coat of the Primer and let it air-dry completely.
Step 2: Base & Dip Apply a thin, even coat of the Bottom Coat (Base Resin). Immediately dip the nail into your chosen Dip Powder Color. Tap off the excess powder. Repeat the Base and Dip application 2–3 times for desired color opacity and strength.
Step 3: Cure & Shape Apply a generous layer of the Activator over all powdered nails to harden the resin. Allow the Activator to air-dry for 1–2 minutes. File and buff the nail to achieve a smooth surface and perfect shape, then dust thoroughly.
Step 4: Finish Apply a second thin coat of Activator. Do not wait for it to dry. Immediately apply a layer of Top Coat while the Activator is still damp. The Top Coat will cure instantly. Apply a final layer of Top Coat for maximum shine and protection. The system is complete! Enjoy your candy treat and teddy bear.
Key Benefits:
Professional Quality Finish: Creates a light, strong, and durable enhancement that lasts up to three weeks without chipping.
Vibrant Color Range: Includes a curated collection of five colors, from classic Pink to fun Purple and Yellow, plus a shimmering option.
Full System Inclusion: Provides all necessary professional liquids and tools for immediate, successful application and easy clean-up with the Brush Saver.
Perfect Gift: Comes complete with a comforting Teddy Bear Plushie and Candy Treat for an enjoyable, pampering experience.
Warnings and Safety Precautions:
Please adhere to safety guidelines for proper product use:
Avoid Skin Contact: The Dip Liquids (Bottom Coat and Activator) are strong bonding agents. Avoid all contact with the skin. If contact occurs, wipe it away immediately.
Ventilation: Use all liquids in a well-ventilated area to disperse strong vapors.
Brush Care: Clean the brushes from the Bottom Coat and Top Coat immediately after use with the Brush Saver to prevent the brush hairs from hardening.
Flammability: Keep the Activator away from heat, open flames, or any ignition sources. Keep bottles tightly capped.
Discontinue Use: If irritation, redness, or burning occurs, remove the product immediately and seek medical advice.
How to use and Warnings
How to use and Warnings
💅 How to Use (Step-by-Step Instructions):
For best results, follow the Gel Polish sequence precisely:
Step 1: Prep & Prime
Use the Cuticle Pusher to gently push back the cuticles. Shape the natural nail with the Nail File and lightly buff the surface to remove shine. Cleanse the nail (alcohol wipe recommended). Apply a thin coat of Primer and let it air-dry completely.
Step 2: Base Coat
Apply a very thin, even coat of the Base Coat (like the Bottom Coat). This layer adheres the polish to the natural nail. Cure this coat under a UV/LED lamp for 60 seconds. Do not wipe the tacky layer.
Step 3: Color Application
Apply a thin, even coat of your chosen Gel Polish Color. Avoid getting polish on the skin or cuticles. Cure this coat under a UV/LED lamp for 60 seconds. Apply a second thin coat of Color for opacity, and cure again for 60 seconds.
Step 4: Top Coat & Finish
Apply a thin, even coat of the Top Coat (like the Top Coat). Ensure the free edge (tip) of the nail is sealed. Cure this final coat under a UV/LED lamp for 60-120 seconds (follow your lamp's instructions). If your Top Coat leaves a sticky residue (a "tacky layer"), wipe it gently with an alcohol pad to reveal the high-gloss shine.
✨ Key Benefits:
- Salon-Quality Shine: Achieves a highly pigmented, glass-like finish that is chip-resistant and lasts up to three weeks.
- LED/UV Cured Durability: The light-curing process ensures a quick, hard, and durable set that provides long-lasting wear.
- Full System Inclusion: Includes the essential Base Coat, Top Coat, and Color Gels, along with necessary tools like the Cuticle Pusher and Nail File for immediate application.
- Ready-to-Go Kit: Perfect for beginners and enthusiasts, offering a complete professional system in one convenient box.
⚠️ Warnings and Safety Precautions:
Please adhere to safety guidelines for proper product use:
- Avoid Skin Contact: Gel polish may cause irritation if it cures on the skin. Avoid all contact with the skin. If contact occurs, wipe it away immediately before curing.
- Proper Curing: Ensure your UV/LED lamp is working correctly and that you cure each layer for the recommended time to prevent under-curing, which can lead to irritation.
- Storage: Keep all gel polish bottles tightly capped and stored away from direct light (especially sunlight or the UV/LED lamp), as the product will prematurely cure and harden.
- Discontinue Use: If irritation, redness, or burning occurs, remove the product immediately and seek medical advice.
- Removal: Do not peel or forcefully remove gel polish. Use the proper soak-off method (usually with acetone) to prevent damage to your natural nails.
Share